

An offer always belongs to a campaign. Create or open the campaign first — an offer cannot exist on its own.
Add an Offer block to your campaign
- Go to Campaigns and open the campaign you want the offer to belong to, or create a new one.
- Open the campaign’s Orchestration tab.
- In the Block library, under Activity, add an Offer block.
- Open the block. The offer form opens in a full-screen dialog.
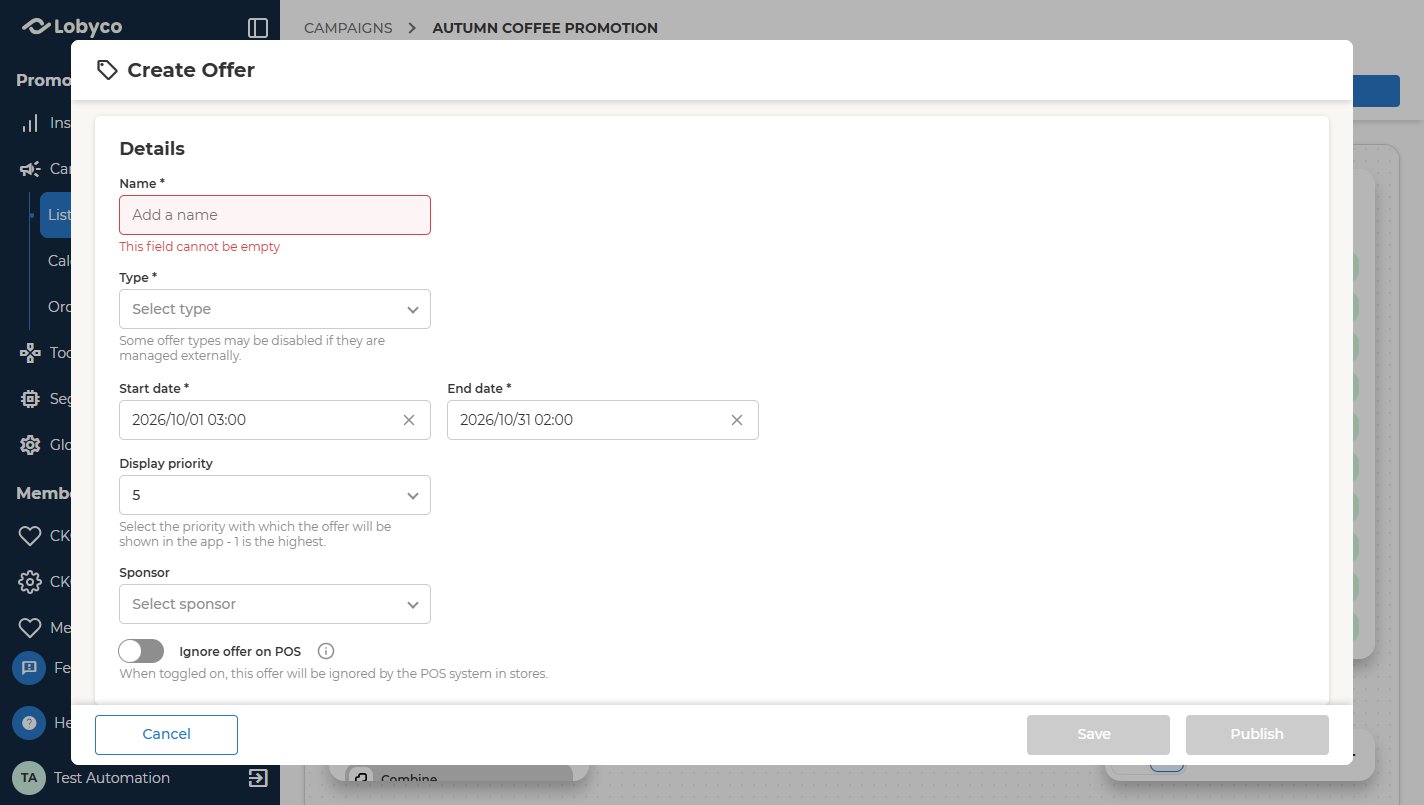
Fill in Details
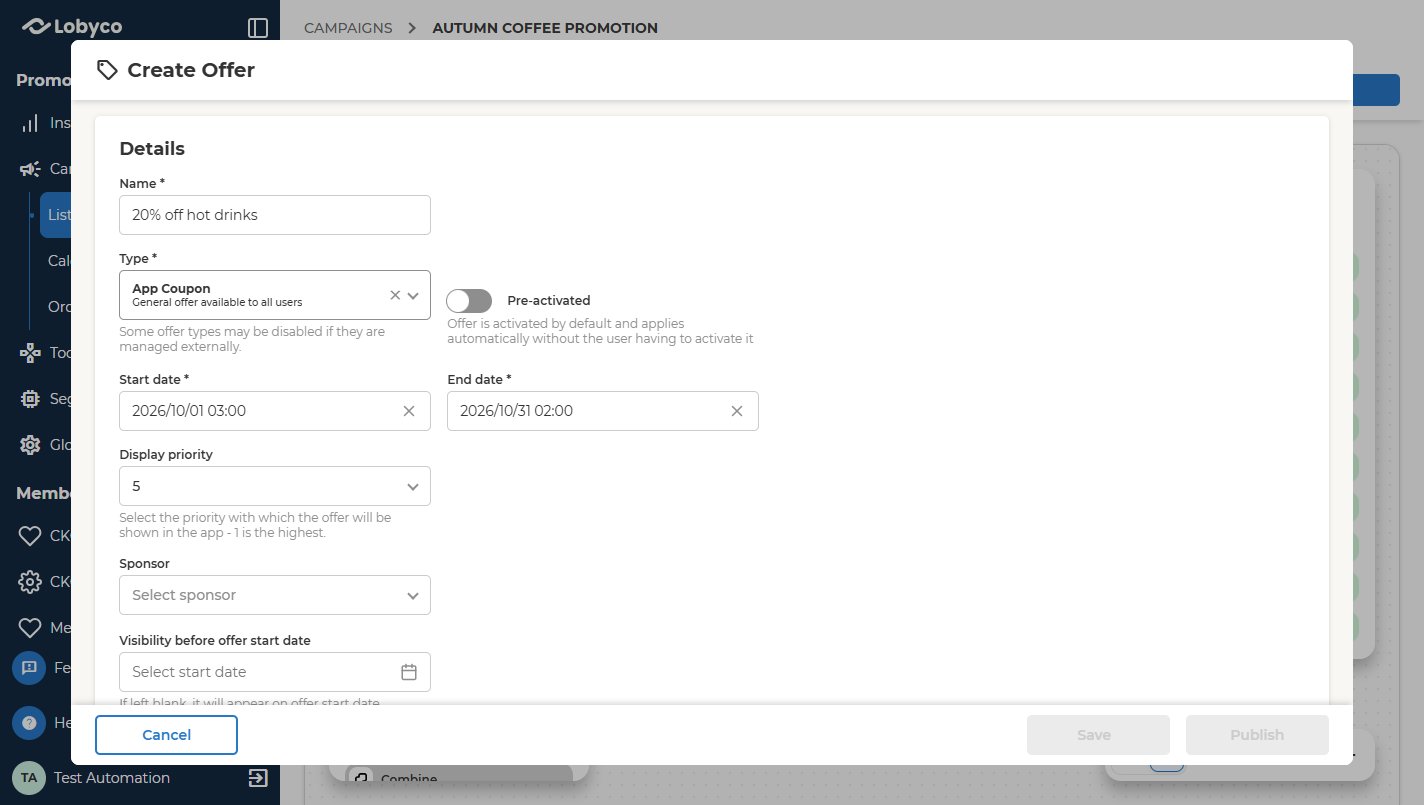
Open the Details panel and name the offer, then choose its type.Not every field in this article appears in every environment. Which offer types, checkout types and content fields you see depends on what is enabled for your setup.
The offer’s dates must sit inside the campaign’s own dates.
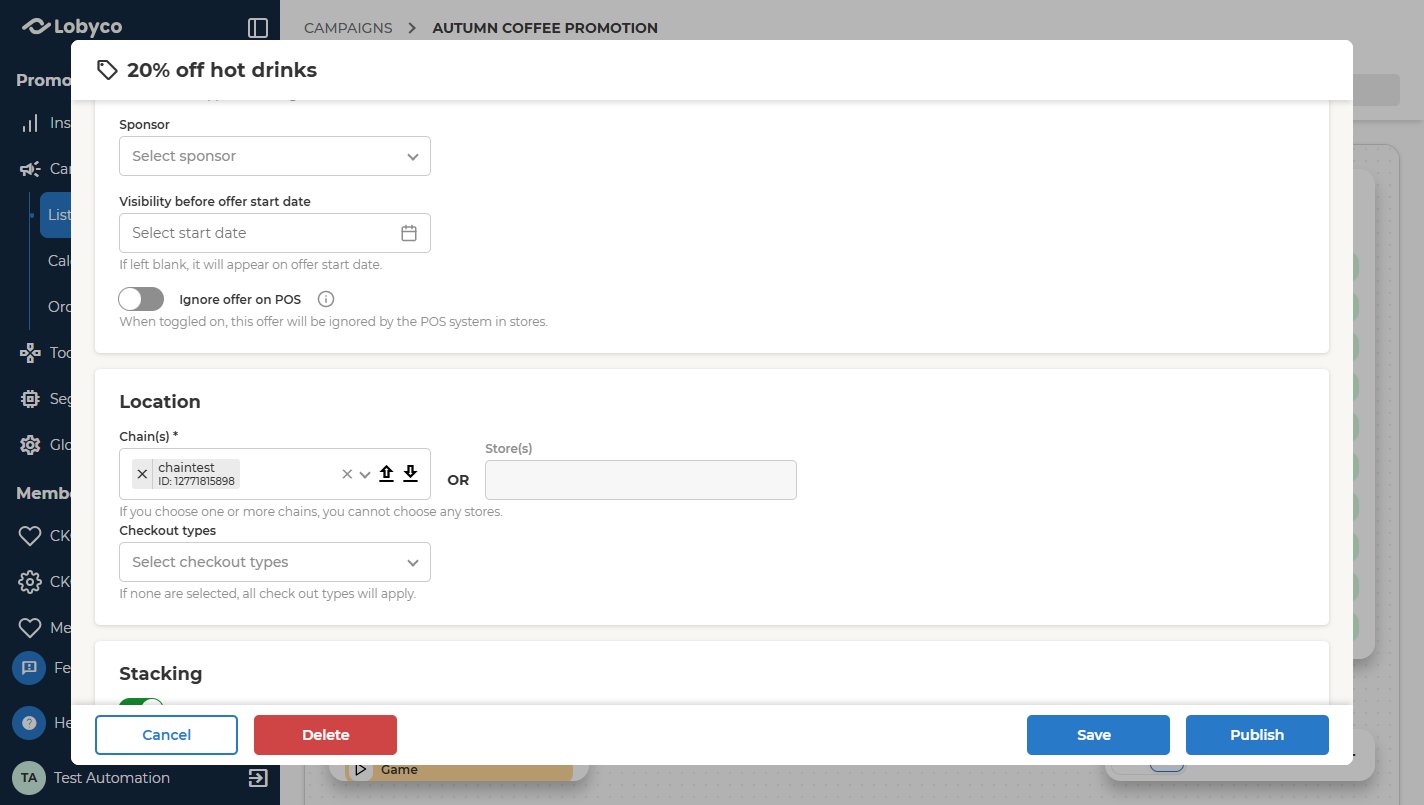
Set where the offer is valid
Open the Location panel and choose whether the offer is valid in Chain(s) or in Store(s). The two cannot be combined — selecting one or more chains disables the store selector, and the other way round.- Pick either Chain(s) or Store(s).
- To upload a store list instead of picking stores by hand, use the up arrow on the store field: CSV, one store ID per line.
- To export what you have selected, use the down arrow on the store field.
Set the discount and its limits
The next four panels are covered on their own pages, because each is a subject in itself. Work through them in the order the form presents them:- Stacking — how this offer behaves alongside others. See Stacking and limits.
- Discount — the seven discount models, what each supports, and worked examples. See Discount types.
- Limits — the caps on what the offer gives away. Covered on the Stacking and limits page too.
Write what the customer sees
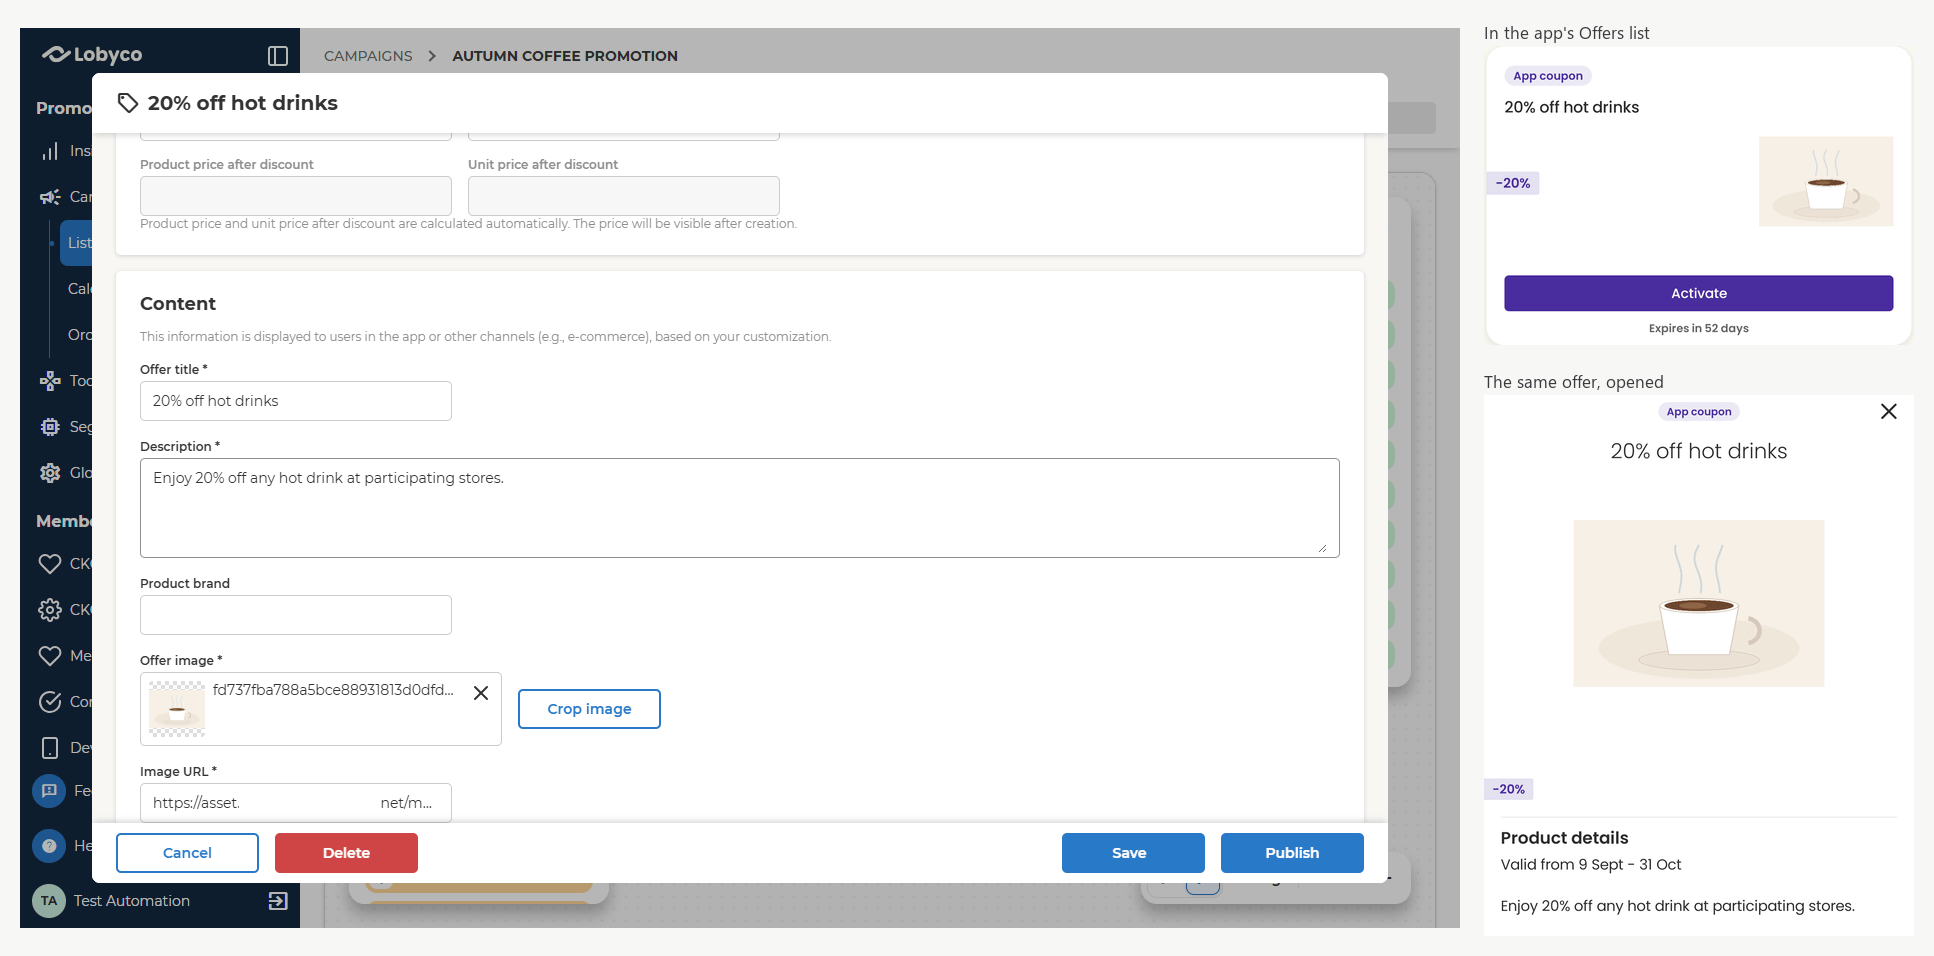
Open the Content panel. This is the information shown to customers in the app or other channels, based on your customization.
Additional metadata fields can be added to this panel to customize the look and feel further — during implementation, or later on request.
Save or publish the offer
At the bottom of the form:- Click Save to keep the offer without publishing it. It stays a draft until you publish.
- Click Publish when the offer is ready to go live, then confirm — the portal asks before it goes active.
- Click Cancel to close the form without keeping your changes.
- Click Delete to remove the offer entirely.
Troubleshooting
Why can't I edit this offer?
Why can't I edit this offer?
The form is read-only when the offer’s status or its campaign’s state no longer allows editing, and in environments configured as read-only. A published offer cannot be edited freely — see Edit or reuse an offer for what can still be changed once it is live.
Why doesn't the Pre-activated toggle change anything?
Why doesn't the Pre-activated toggle change anything?
The toggle is shown and can be switched for every offer type, but it currently only takes effect for App Coupon, Liquor and Preferred Store.
Why don't I see the Prices panel?
Why don't I see the Prices panel?
Prices only appears when the discount type is a simple line discount. Choose a different discount type and the panel disappears.
Why don't I see the Segmentation panel?
Why don't I see the Segmentation panel?
Segmentation only appears for offer types that support it. If the type you picked isn’t segmentable, there is nothing to target and the panel is hidden.
Why can't I save this offer as a template?
Why can't I save this offer as a template?
Save as template is not available while the offer is being edited inside a campaign. Templates are made from offers that are not tied to one campaign.
Why are my dates rejected?
Why are my dates rejected?
The offer’s start and end dates have to sit inside the parent campaign’s dates. A date outside them shows “This date cannot precede the campaign start date” and Publish stays disabled until you fix it — so widen the campaign’s dates first if you need a wider offer. Start times in the past are accepted.
I changed the benefit type and lost my rules
I changed the benefit type and lost my rules
Changing Benefit type resets the offer types of every rule you have added, and changing Type resets the rules themselves. The portal asks you to confirm before either, because neither can be undone.
Related
- Offer types — what the Type field decides, and how each type allocates coupons.
- Discount types — the seven discount models and what each one supports.
- Stacking and limits — how this offer behaves alongside others, and the caps on it.
- Edit or reuse an offer — what can still be changed once it is live.