

memberId the POS uses for the rest of the sale.
Before you start
- The checkout is registered as a payment location, and the POS knows its identifier. See Setting up a payment location.
- Server-to-server authentication must be working. See API authentication.
- Decide which direction the POS supports. Scanning the app needs a scanner at the till. The sticker needs nothing on the POS beyond one call when the cashier presses subtotal or total.
The flow
1
Identify the customer
- The POS scans the app
- The customer scans a sticker
POST /v2/checkin/{paymentLocation}The customer opens their check-in code in the app. It is a QR code or a barcode that Lobyco generates for them. The POS scans it and sends the value as 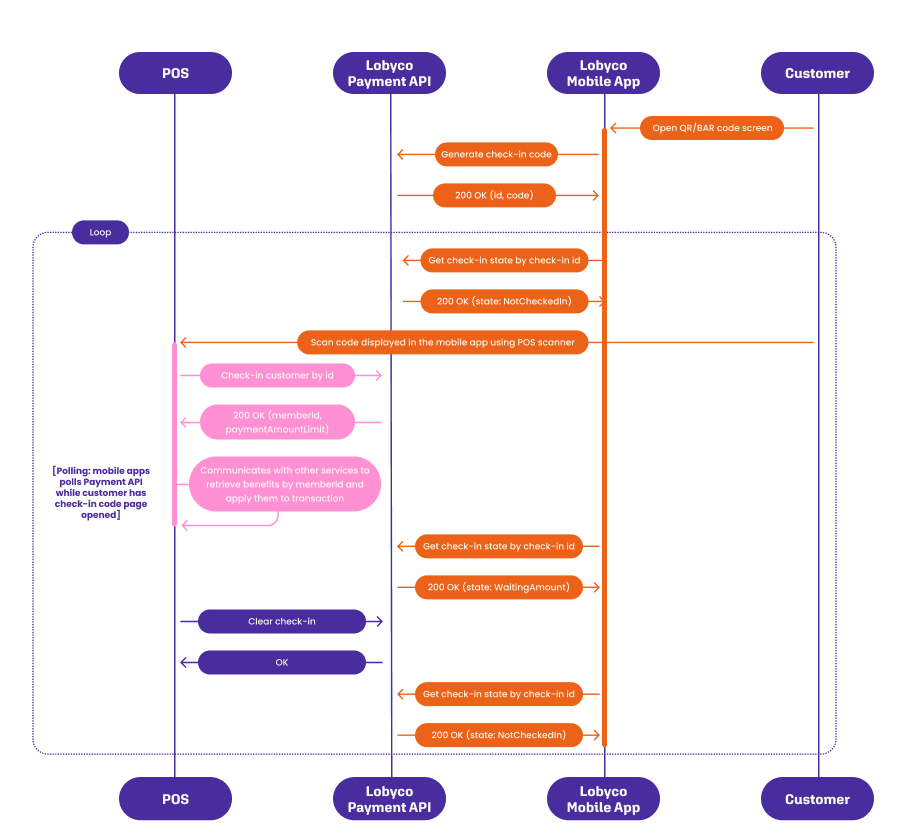
code.A customer who does not use the app checks in with the same call. Send one of these instead of code:loyaltyCardId, when the customer shows a physical loyalty card.phone, when they give a phone number.memberId, when the POS already knows who the customer is.
memberId, the customer’s id.paymentAmountLimit, the most the customer can pay from their Lobyco account.paymentMethods, the payment methods the customer can use.
404 Not Found.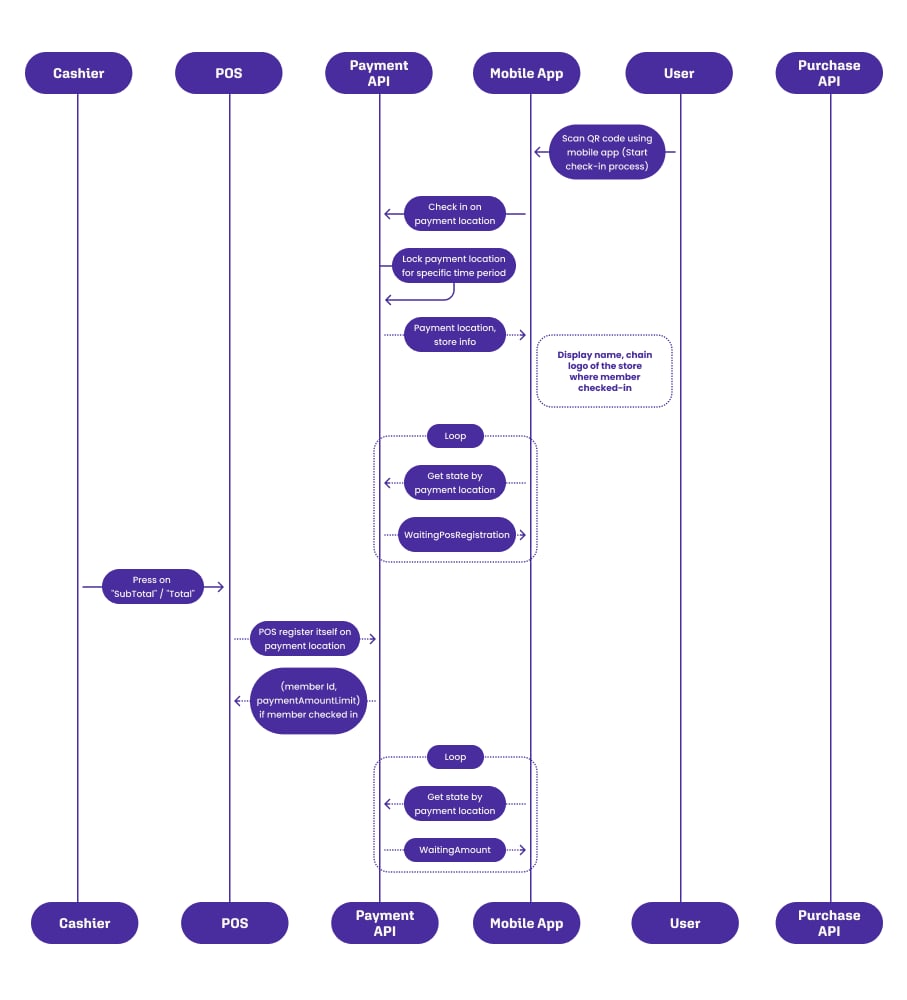
2
Use the customer id
Carry thememberId through the rest of the sale. It is the customerId in the path of the coupon calls. It is the memberId on the discount basket, on the payment and on the purchase you record at the end.3
Clear the check-in
POST /v1/checkin/{paymentLocation}/clearCall this when the sale is complete or abandoned. It releases the payment location, so the next customer can check in and the app stops showing the previous customer as checked in.Failure and edge cases
A successful check-in is a200 OK with a memberId. The app shows the customer as checked in at the store and waits for the payment amount.
- The sticker check-in is temporary. If the POS does not collect it before it expires, the customer scans the sticker again.
- One customer per location at a time. A payment location holds one check-in. Clear it at the end of every sale, including sales the customer walks away from, so the location is free for the next customer.
- Check-in alone grants nothing. It identifies the customer. Discounts, payment and bonus each come from their own call later in the flow.
API reference
Endpoint documentation: Payment Coordinator.Related
- Setting up a payment location — the registration every check-in call depends on.
- Direct coupon service integration and Discount integration — the first calls that use the
memberId. - Payments — taking the payment from the checked-in customer.