

Intro
Azure AD multi-tenant authentication using the OAuth 2.0 client credentials flow enables secure and scalable access to APIs across multiple Azure AD tenants. This setup is ideal for scenarios where customers operate their own Azure AD tenants. A key advantage is that customers have control over the secrets associated with their own tenant. This control is crucial for meeting compliance and regulatory requirements, as it allows customers to enforce their own security policies and practices.Step by step guide to setup multi-tenant Azure AD authentication
1
Contact Lobyco to receive authentication configuration
Lobyco needs to create multi-tenant app on it’s end and share following configuration values:lobyco_app_idlobyco_app_namelobyco_app_uri
2
Import Lobyco multi-tenant app into your active directory
In order to see available roles of Lobyco multi-tenant application, service principal should be created in the client’s tenant that represents the application from the Lobyco tenant. It can be done using PowerShell script:lobyco_app_name in Enterprise applications blade in Azure Portal.3
Create single-tenant app in your active directory
Create new app registrationThe single-tenant app, which represents the client application in Azure AD, should be registered. Go to App registrations blade in Azure Portal and create new registration.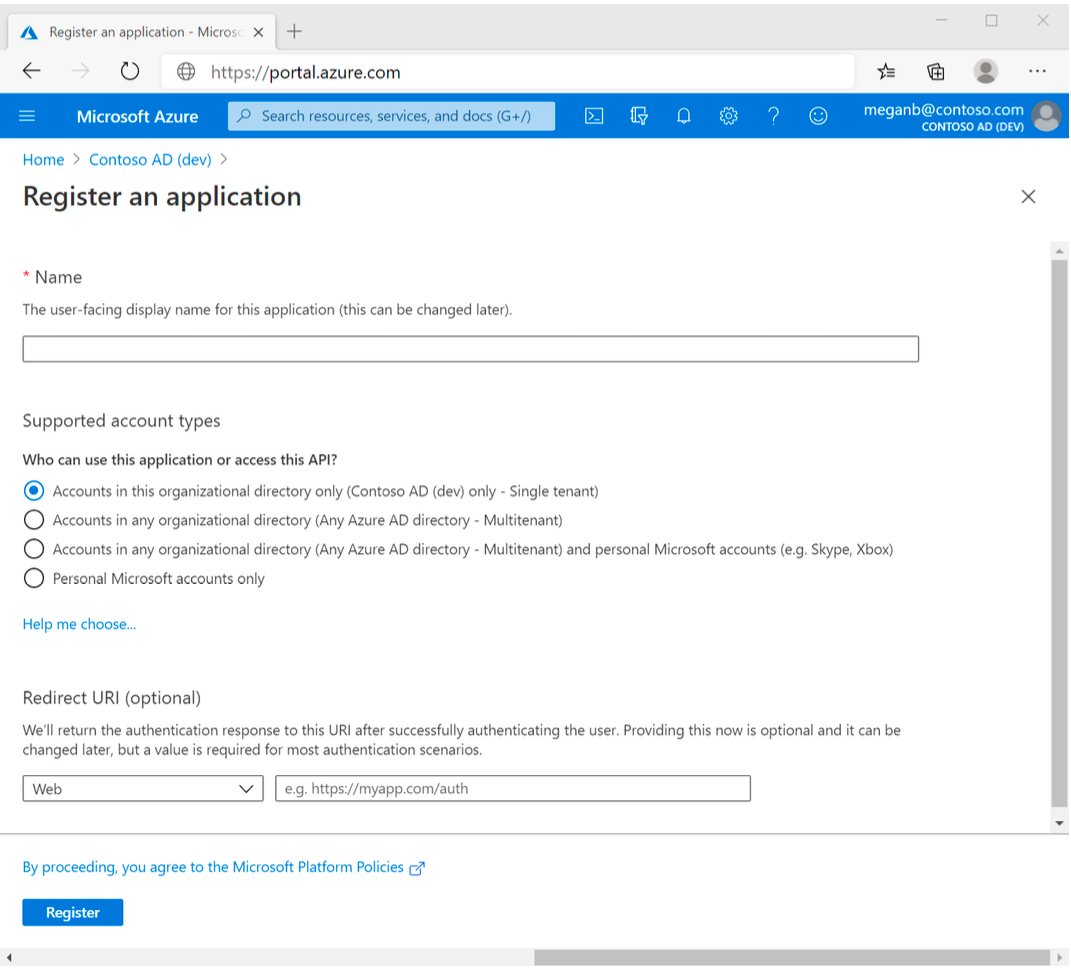
lobyco-api-client-app-{environmentName}Account type: Accounts in this organizational directory onlyRedirect URI: not needed, the client credentials flow doesn’t use it.Select Register to create the application. On the app Overview page, find the Application (client) ID value and record it as client_app_id for later. You’ll need it to pass as parameter to get token endpoint.Set app credentials: certificate or secretAs with any confidential client application, you need to add a secret or certificate to act as that application’s credentials so it can authenticate as itself, without user interaction.Example: Created client secret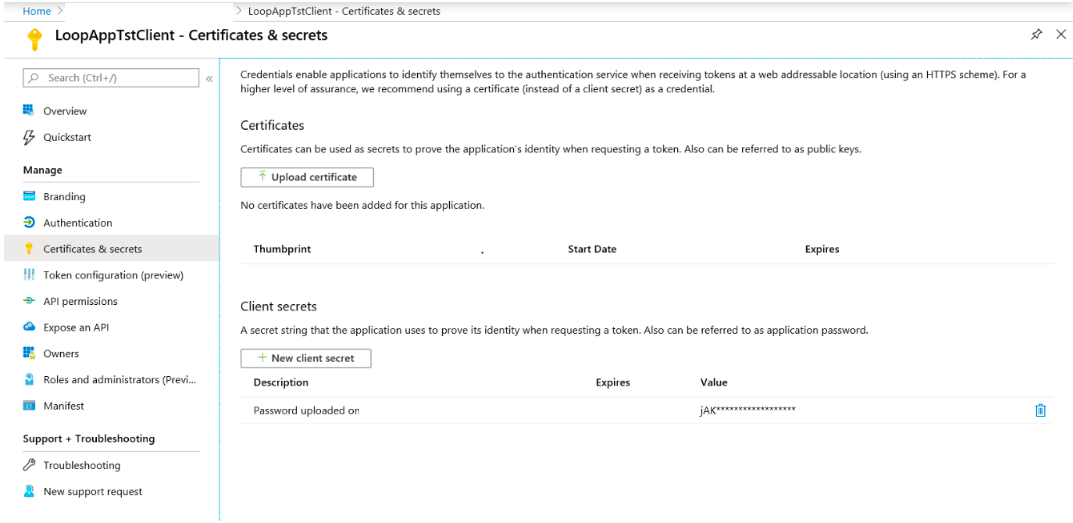
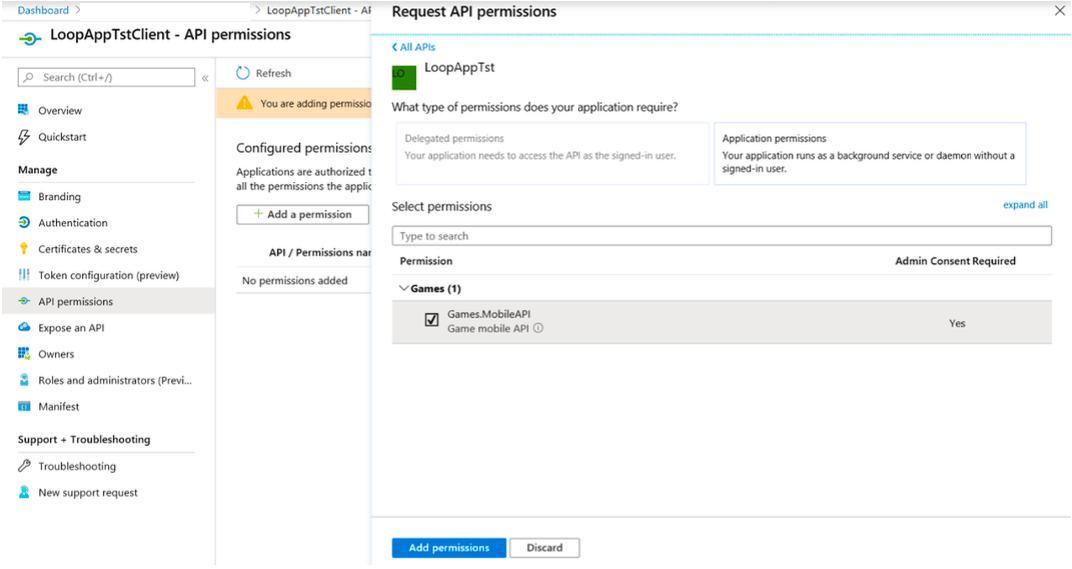
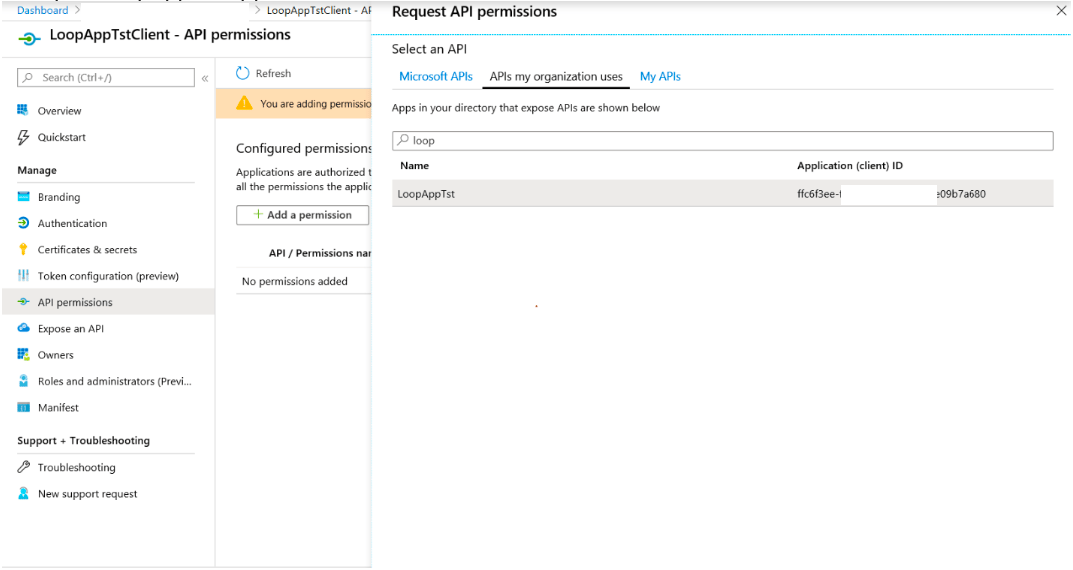
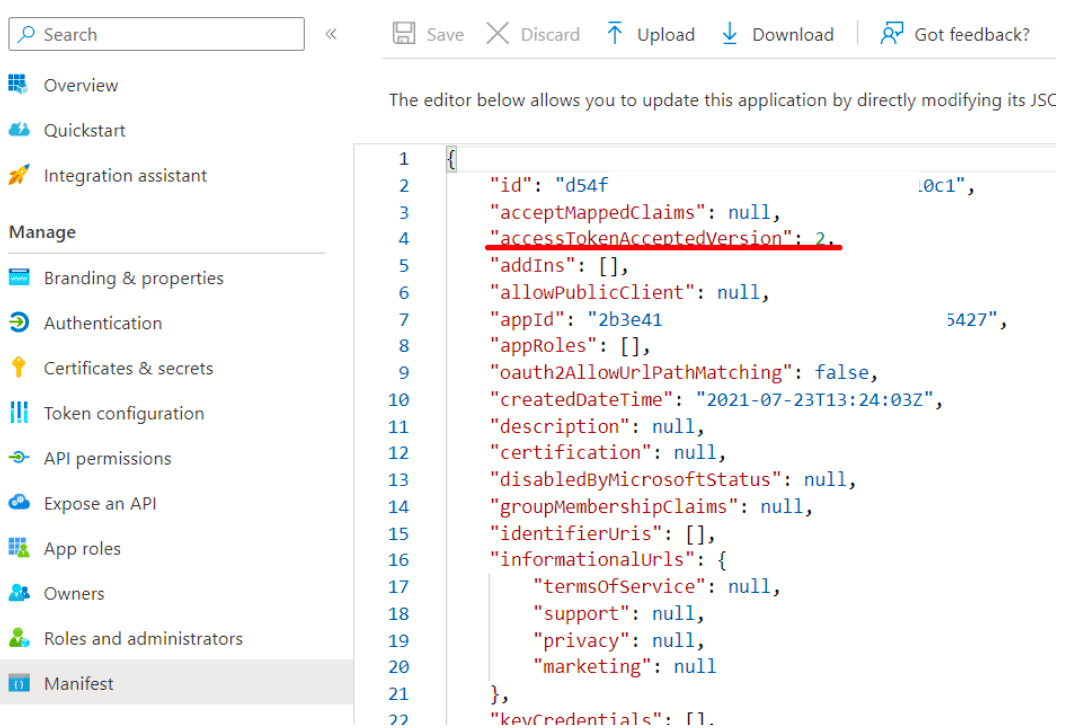
client_app_secret for later. You’ll need it to pass as parameter to get token endpoint.Set API permissionsClick Add a permission button and select APIs my organization uses tab. Type lobyco_app_name or lobyco_app_id value received from Lobyco.Example: a test app (‘LoopAppTst’ in the screenshots) and its roles: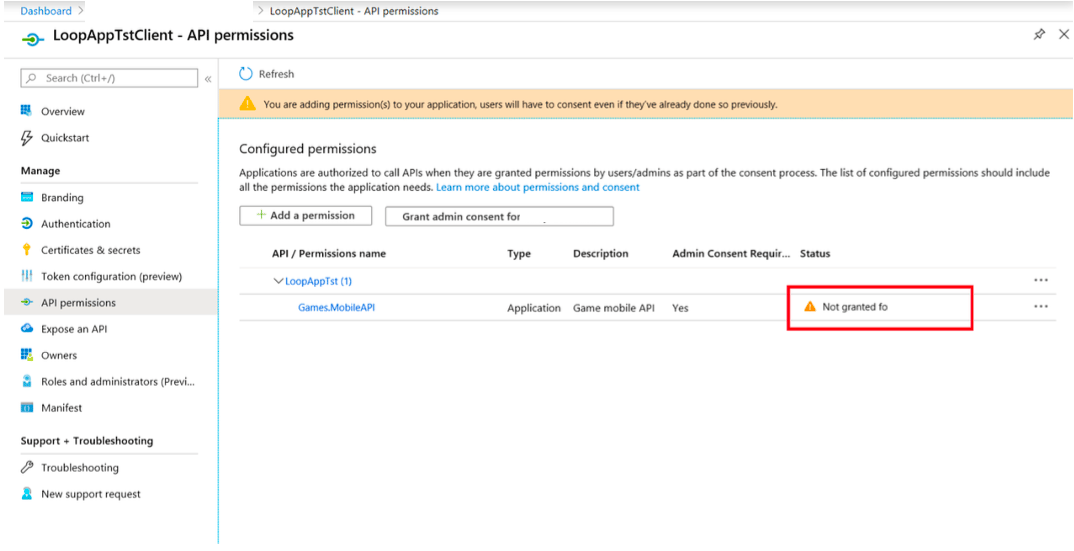
4
Get token using secret
To get a token by using the client credentials flow, send a POST request to the /token endpoint of Microsoft identity platform:{lobyco_app_uri}.default regardless which scopes have been configured.Successful response example:5